A210 SODIMM V2 Development Board Flashing Guide
Note:
About how to obtain the pre-built image, please see Quick Start Guide.
Preparing the Flashing Environment
Switching the Board to Flash Mode
-
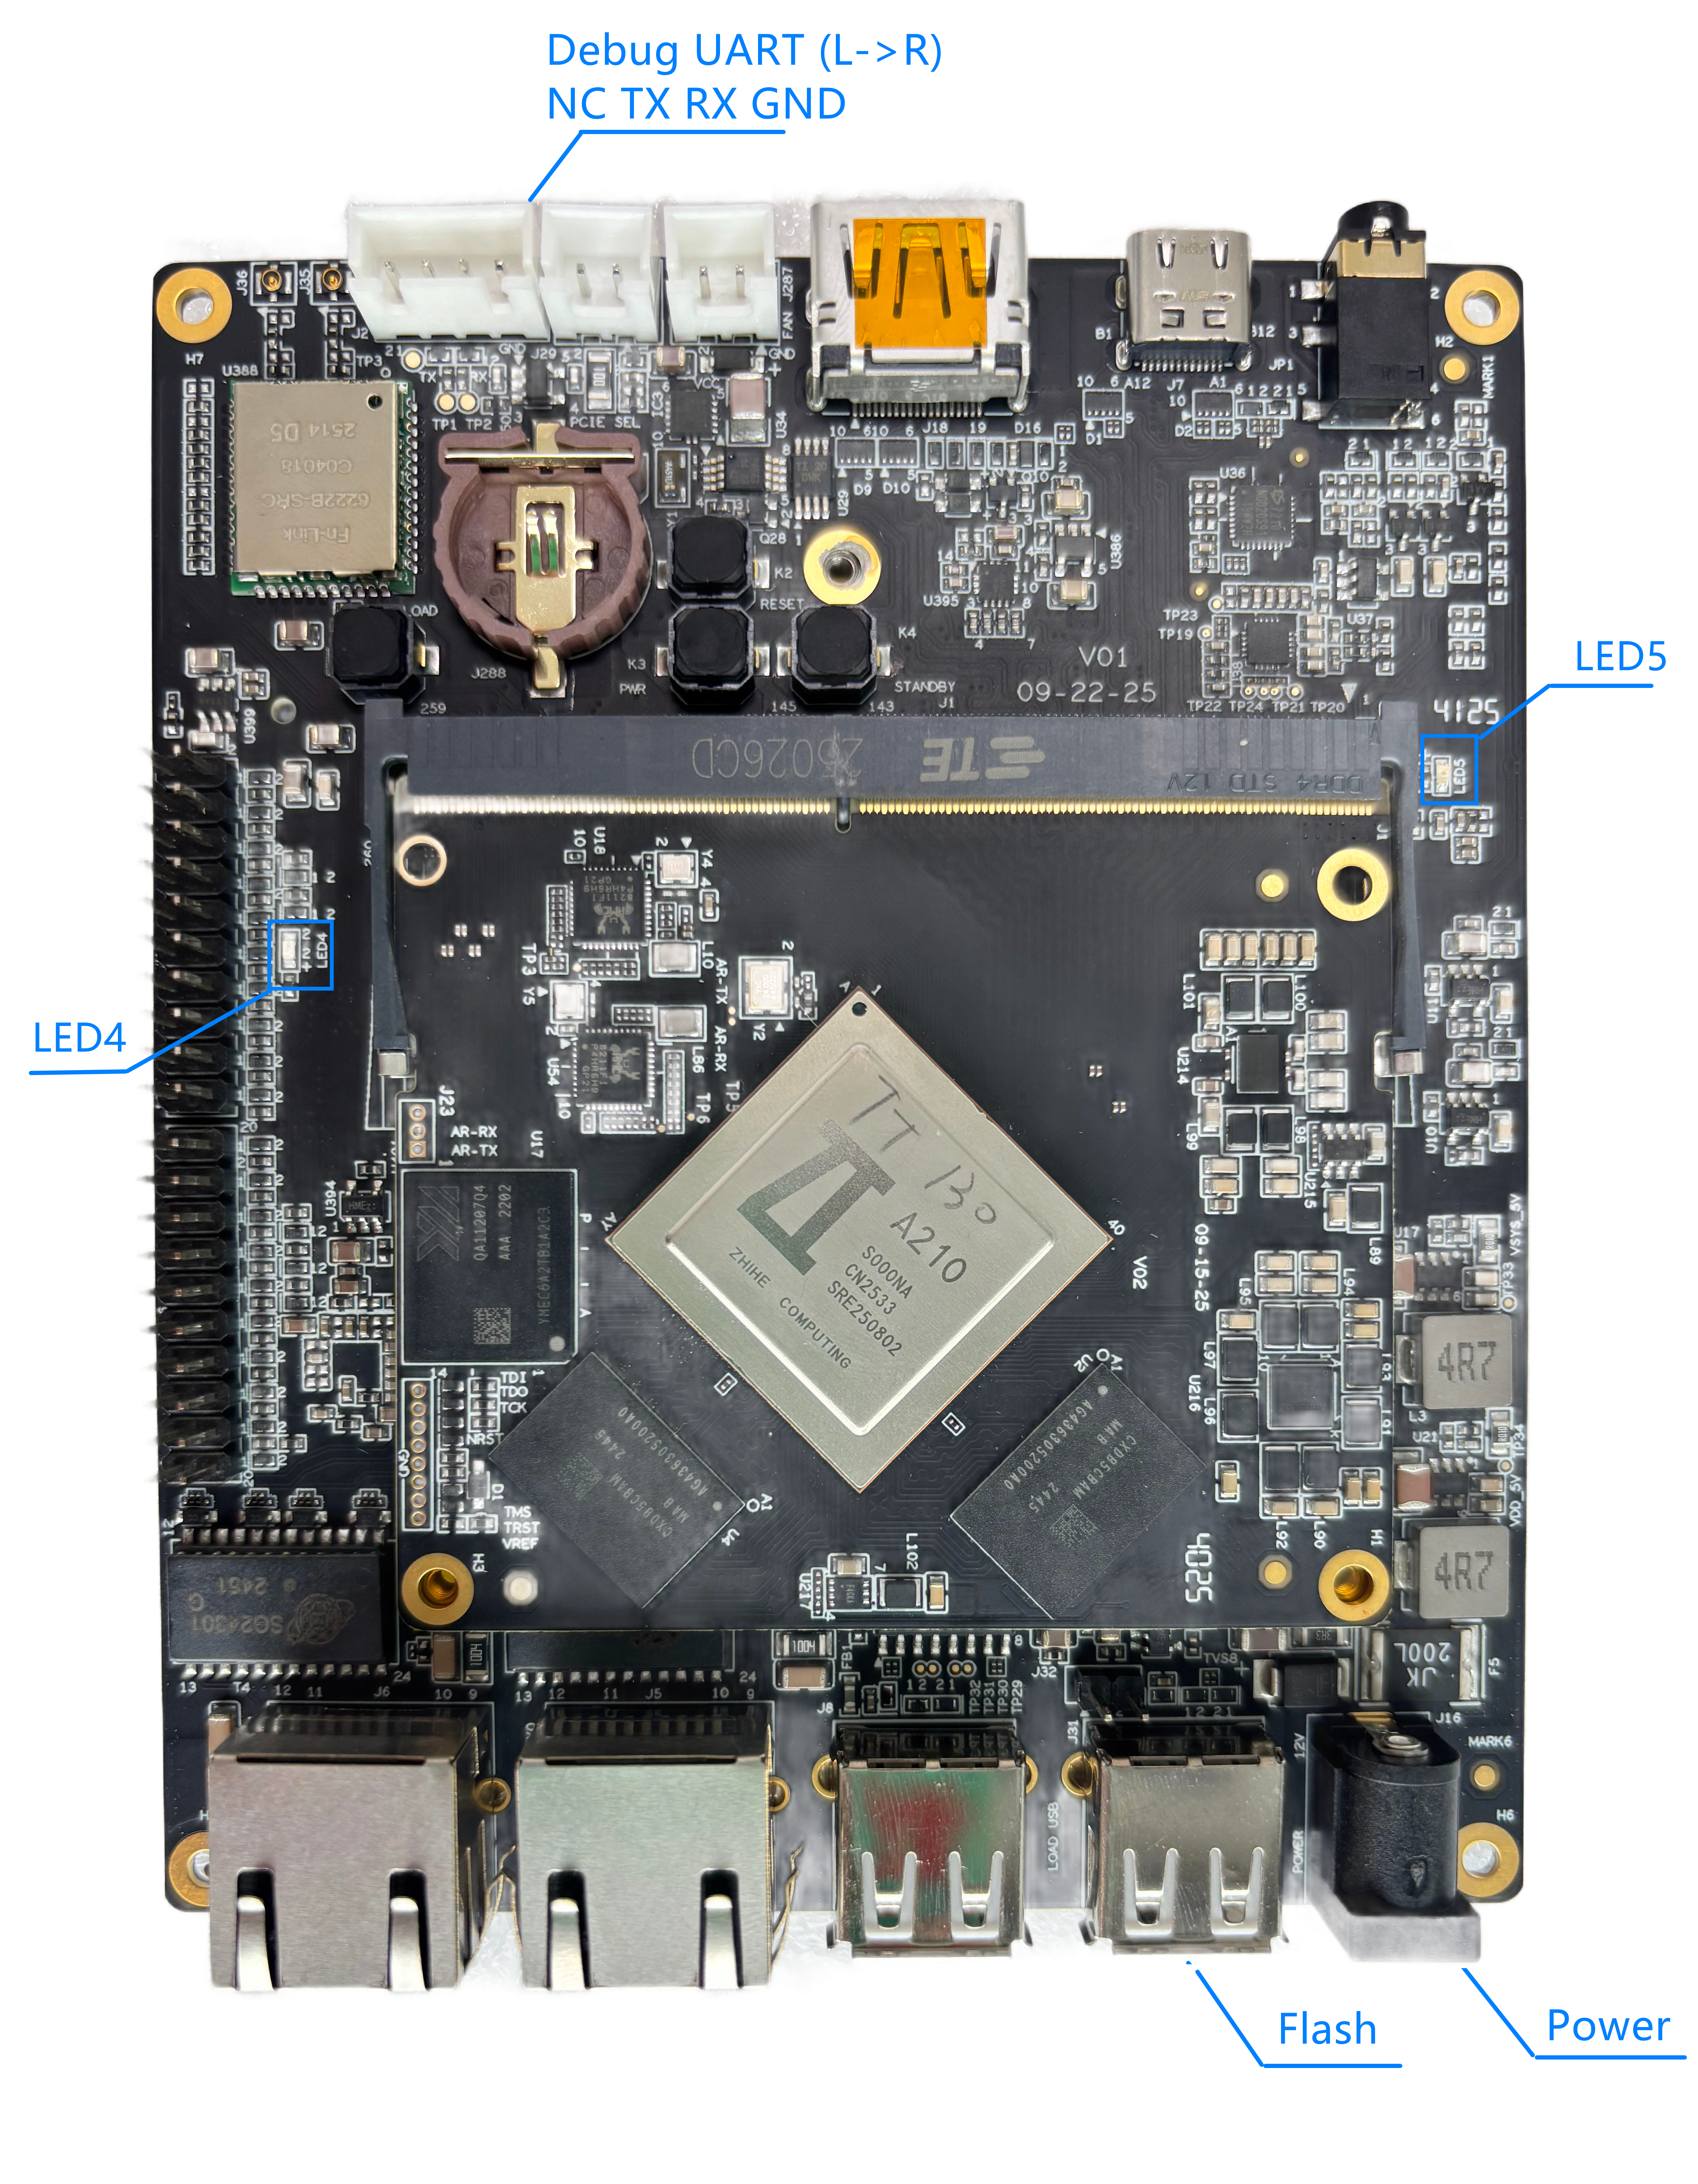
Make physical connections. LED 4 and LED 5 will be steadily lit after the power connection.
- 12V DC power input.
- a TTL-level serial adapter for the debug UART. Please follow the pinout below when connecting to the computer (Default baud rate: 115200 bps).
- A USB-A interface connected to the computer for flashing.
-
Press the Power Button to power on the board. LED4 turns off while LED5 remains on, indicating a normal boot mode.
-
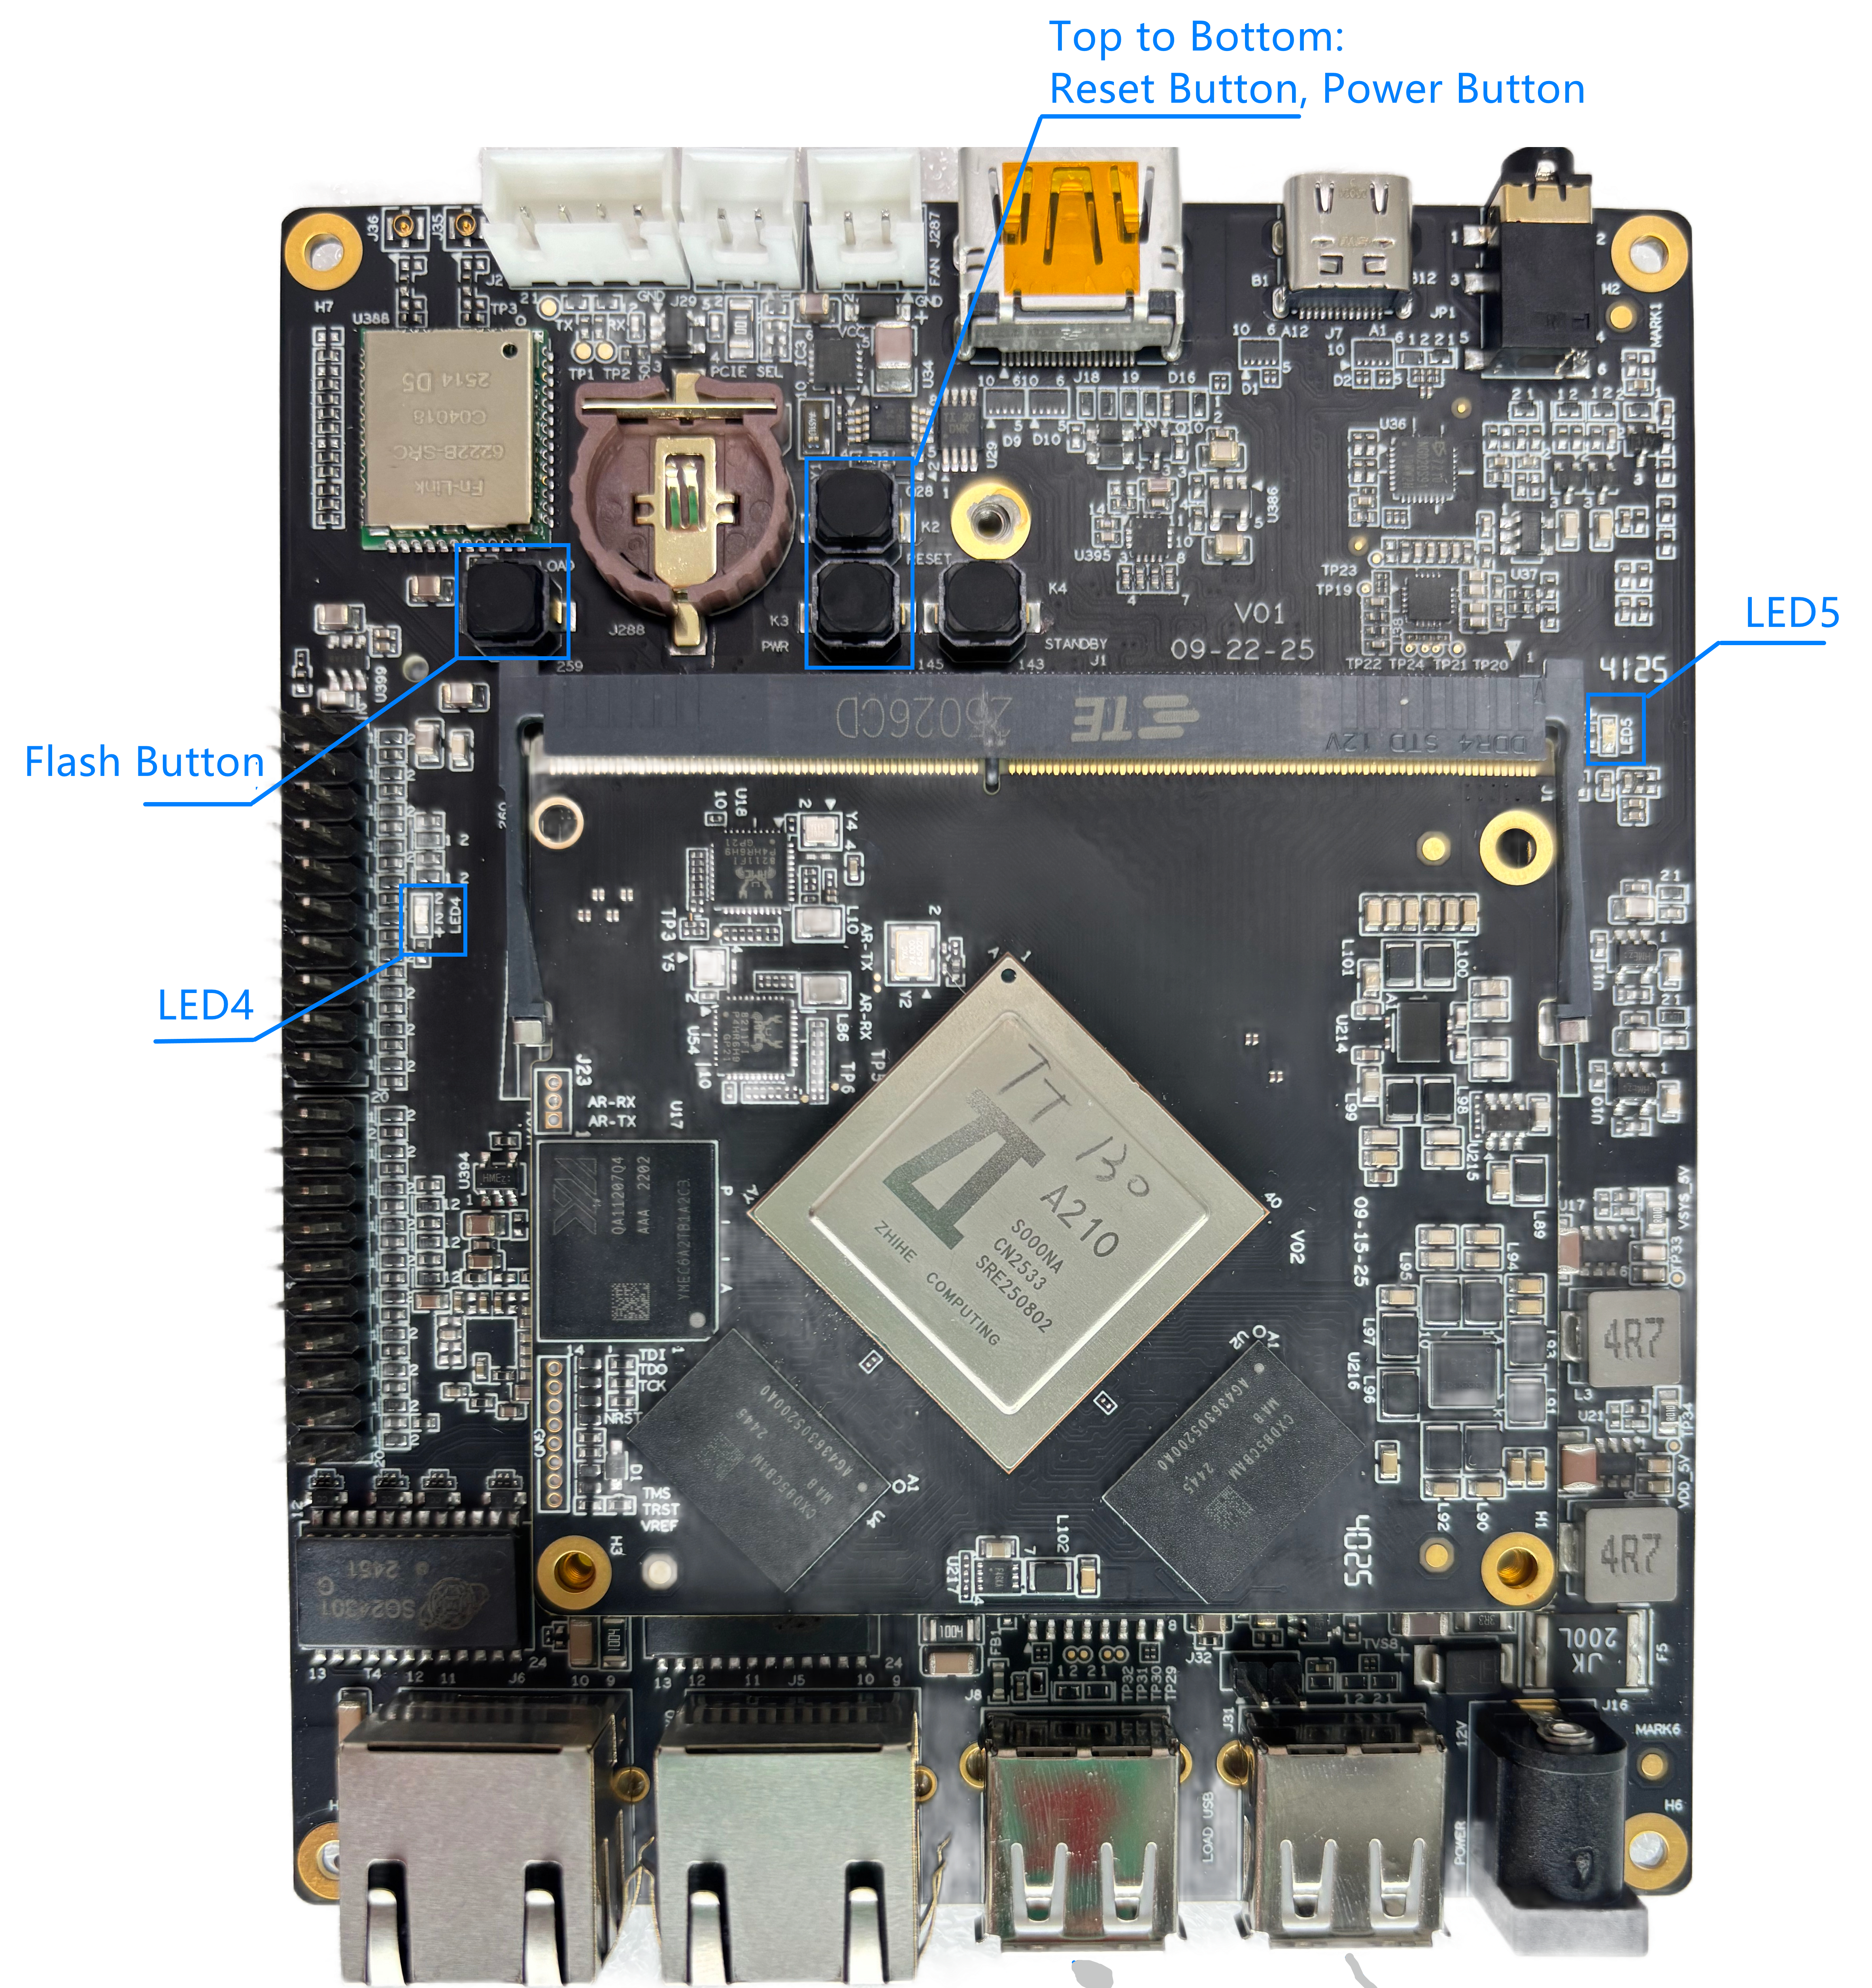
Activate the flash mode. The button location is shown in the figure below. a. Press and hold the Flash Button. b. Press the Reset Button while holding the Flash Button to switch to the USB flash mode.
Software Environment Preparation
-
Essential software for Windows:
-
For Ubuntu Linux:
Execute the commands to install the tools.
sudo apt install android-sdk-platform-tools
Configuring Fastboot on Windows
-
Extract platform-tools-{latest}-windows.zip to a folder. (e.g.,
C:\platform-tools). -
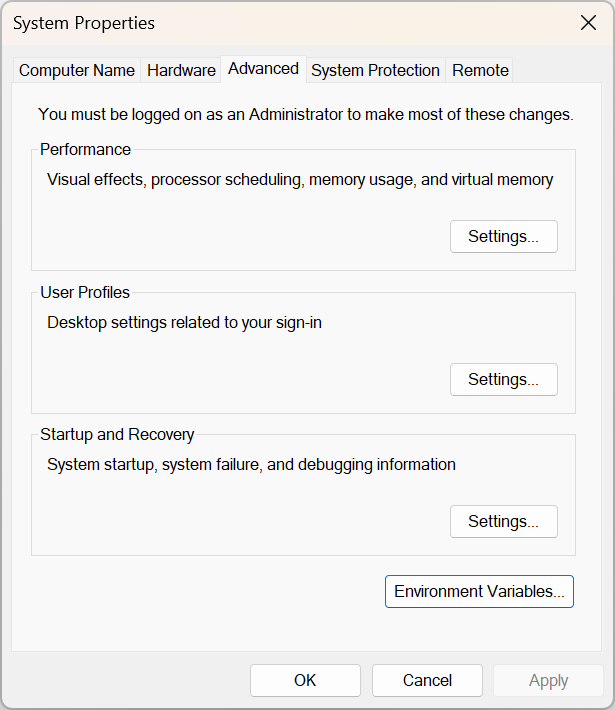
Enter Settings > System >About > Advanced system settings. Click Environment Variables.
-
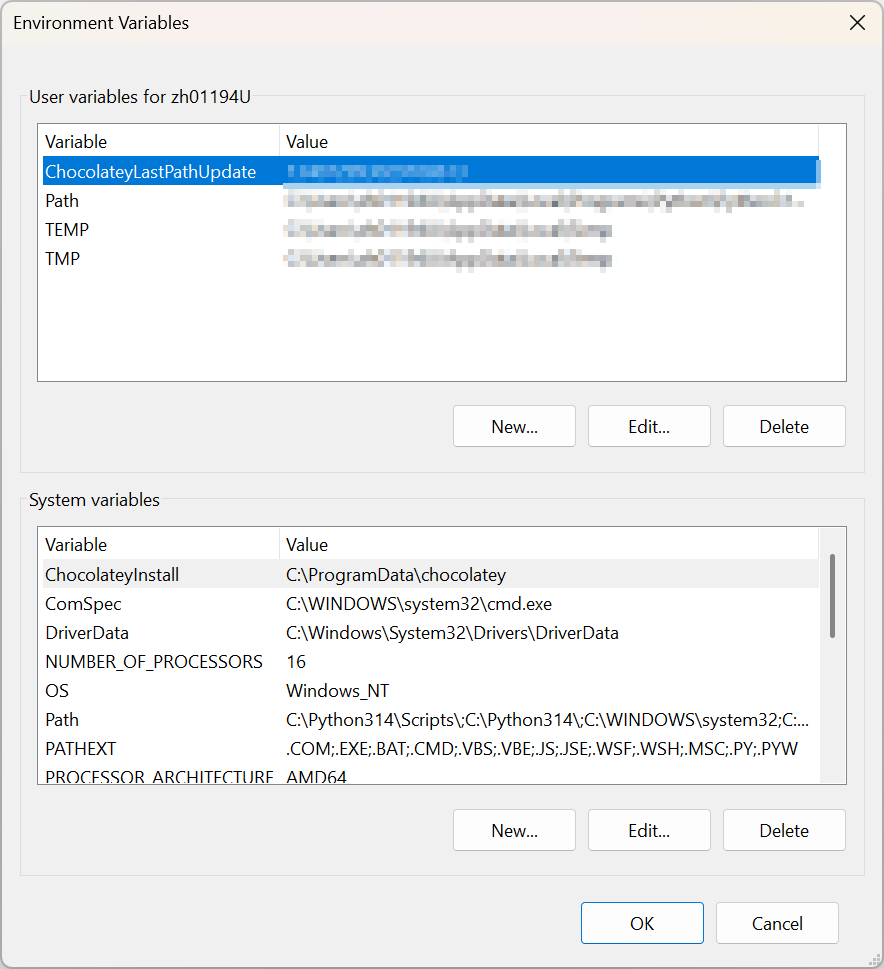
Double-Click the Path variable to enter Edit environment variables window.
-
Double-click an empty row. Click Browse and select the specified
platform-tools_pathdirectory. Click OK to close all windows.
-
Open a new terminal and run
fastboot --version. A returned result of Fastboot version and class path indicates that the configuration is successful.PS C:\Users\...> fastboot --version
fastboot version 34.0.5-10900879
Installed as C:\Users\...\Documents\platform-tools-windows\fastboot.exe
Installing the Fastboot Driver
-
Extract usb_driver_r13-windows.zip to the
platform-tools_pathpath. -
Switch the board to flash mode. Please refer to Switching the Board to flash mode.
-
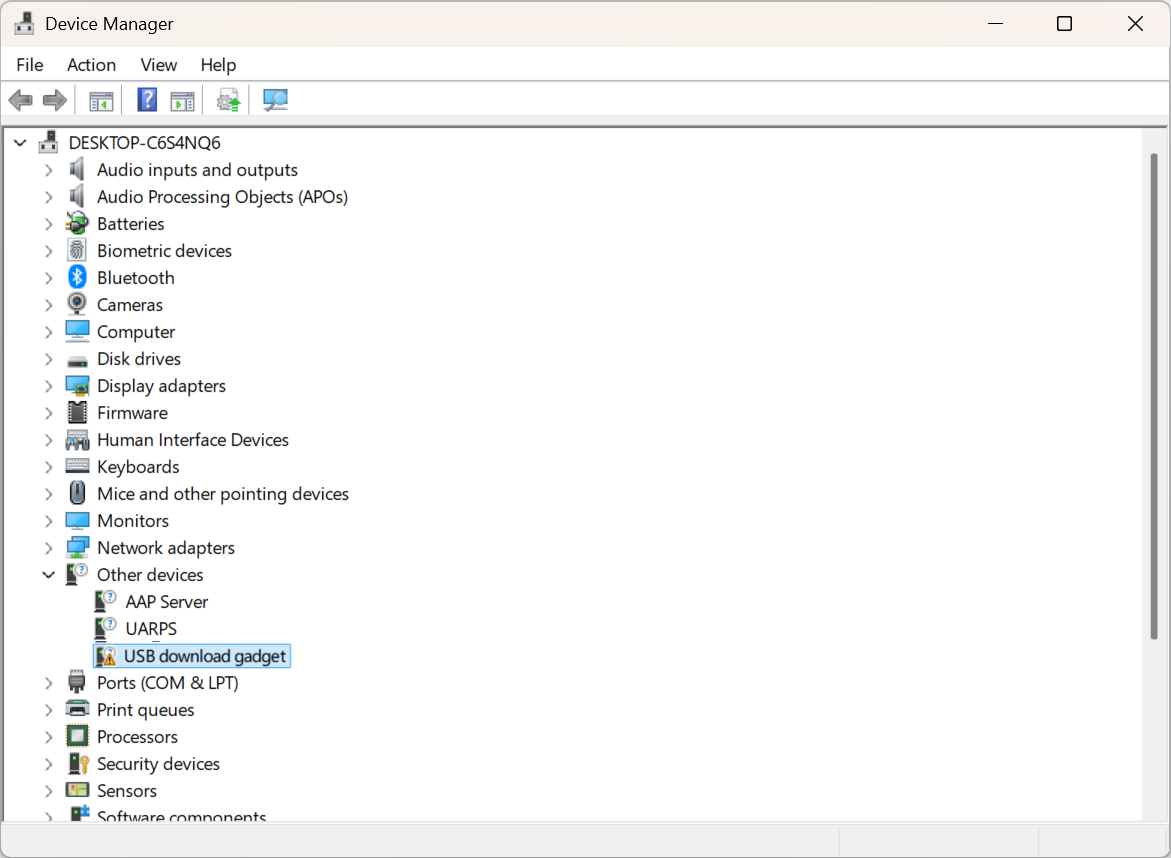
Open Device Manager. Right-click the device node and select Update driver.
-
Select Browse my computer for drivers.
-
Select Let me pick from a list of available drivers on my computer.
-
Select Display all devices. Click Next.
-
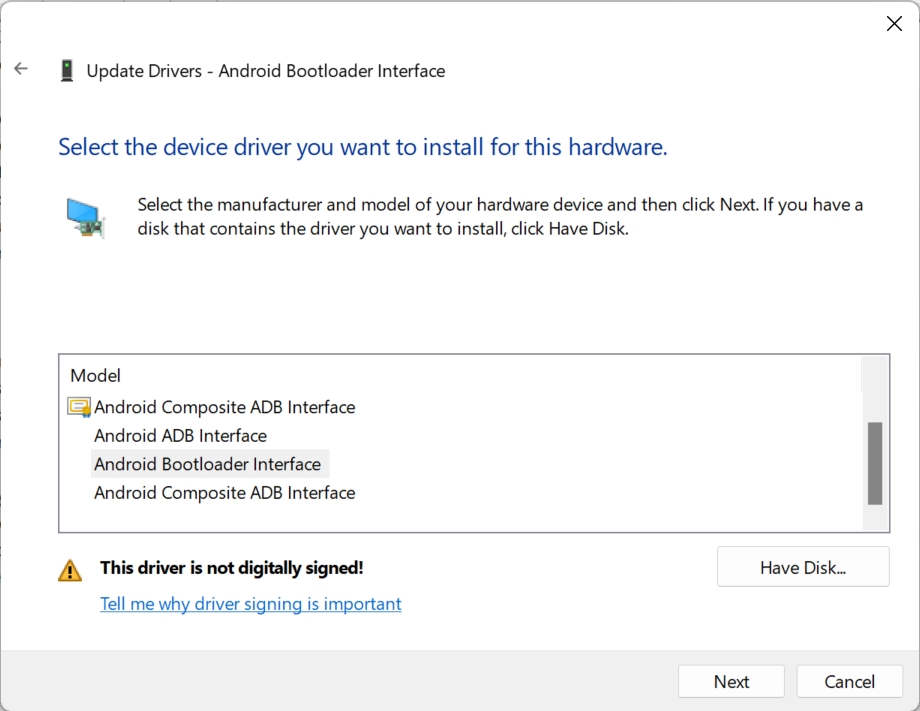
Click Install From Disk. Click Browse on the pop-up Install From Disk dialog box. Select {Extract Directory} > usb_driver > android_winusb.inf. Click OK.
-
Select Android Bootloader Interface, Select Next. Choose OK if there are pop-up dialog boxes to complete the installation.
Flashing
Note:
Please ensure that the development board is in flash mode before flashing.
Flashing the Image on Windows
-
Obtain the image package.
- Copy the images from your build environment (Path:
buildroot/output/images/Release/). - Extract the pre-built image package.
- Copy the images from your build environment (Path:
-
Run the
fastboot_images.batbatch file to start flashing. The results are as follows.C:\Users\...\Downloads\Release>fastboot flash ram emmc_boot-loader.img
Warning: skip copying ram image avb footer (ram partition size: 0, ram image size: 1016990).
Sending 'ram' (993 KB) OKAY [ 0.268s]
Writing 'ram' OKAY [ 0.000s]
Finished. Total time: 0.300s
C:\Users\...\Downloads\Release>fastboot reboot
Rebooting OKAY [ 0.002s]
Finished. Total time: 0.006s
C:\Users\...\Downloads\Release>ping 127.0.0.1 -n 5 1>nul
C:\Users\...\Downloads\Release>fastboot flash gpt emmc-gpt_primary.img
< waiting for any device >
3.The process may pause at < waiting for any device > when flashing for the first time. It indicates that you need to install the Fastboot driver again. The flashing process will resume automatically after a successful driver installation and will prompt you to continue once complete. The returning results are as follows.
Note:
About how to install the Fastboot driver, please see Installing Fastboot Driver.
###### Flash partition home
Sending 'home' (32768 KB)                          OKAY [  1.750s]
Writing 'home'                                     OKAY [  0.715s]
Finished. Total time: 2.614s
###### Images flashed success
Please press any key to continue. . .
Flashing the Image on Linux
Caution:
Please exit
zdockeror use a new terminal outside it, as USB access is not supported withinzdockerenvironment.
-
Obtain the image.
- Enter the image directory
buildroot/output/images/Release/. - Extract the pre-built image package.
- Enter the image directory
-
Run the
fastboot_images.shscript to start flashing. The results are as follows.sudo ./fastboot_images.sh
Login
A typical successful flashing log is shown as follows.
   ###### Start the flashing tool
   Sending 'ram' (12 KB)                              OKAY [  0.005s]
   Writing 'ram'                                      OKAY [  0.000s]
   Finished. Total time: 0.006s
   Rebooting                                          OKAY [  0.000s]
   Finished. Total time: 3.014s
   Sending 'ram' (1054 KB)                            OKAY [  0.045s]
   Writing 'ram'                                      OKAY [  0.000s]
   Finished. Total time: 0.046s
   Rebooting                                          OKAY [  0.000s]
   Finished. Total time: 3.013s
   ###### Wait for the flashing tool to be ready
   ###### Flash gpt
   Sending 'gpt' (17 KB)                              OKAY [  0.007s]
   Writing 'gpt'                                      OKAY [  0.011s]
   Finished. Total time: 0.019s
   ###### Flash loader
   Sending 'mmc0boot0' (553 KB)                       OKAY [  0.028s]
   Writing 'mmc0boot0'                                OKAY [  0.007s]
   Finished. Total time: 0.036s
   ###### Flash partition boot
   Sending 'boot_a' (101376 KB)                       OKAY [  3.805s]
   Writing 'boot_a'                                   OKAY [  0.687s]
   Finished. Total time: 4.534s
   ###### Flash partition system
   Invalid sparse file format at header magic
   Sending sparse 'system_a' 1/4 (131068 KB)          OKAY [  5.421s]
   Writing 'system_a'                                 OKAY [  0.966s]
   Sending sparse 'system_a' 2/4 (131068 KB)          OKAY [  5.778s]
   Writing 'system_a'                                 OKAY [  0.942s]
   Sending sparse 'system_a' 3/4 (131068 KB)          OKAY [  5.746s]
   Writing 'system_a'                                 OKAY [  0.948s]
   Sending sparse 'system_a' 4/4 (32220 KB)           OKAY [  1.414s]
   Writing 'system_a'                                 OKAY [  0.237s]
   Finished. Total time: 21.509s
   ###### Flash partition app
   Sending 'app_a' (32768 KB)                         OKAY [  1.183s]
   Writing 'app_a'                                    OKAY [  0.209s]
   Finished. Total time: 1.416s
   ###### Flash partition home
   Sending 'home' (32768 KB)                          OKAY [  1.141s]
   Writing 'home'                                     OKAY [  0.225s]
   Finished. Total time: 1.367s
   ###### Images flashed success
Reboot
-
Press the Reset Button to reset the board. The button location is shown in the figure below.
-
The returned results are as follows. Type
rootto log into the system. A steadily lit LED5 indicates a successful boot into the system.Starting ifplugd for eth0: OK
Starting crond: OK
Starting dropbear sshd: OK
Starting telnetd: OK
Welcome to Buildroot
buildroot login:root
#
Logging into the Board
The root user account has no default password. Please execute passwd to change the password if you need to access the board remotely via ssh commands.